
Successfully brewing a beer with a balanced flavor profile depends equally on the recipe, as on the proper equipment – today we’ll look at copper and stainless steel wort chillers.
Immersion wort chillers work fantastically for cooling wort to pitch-safe temperatures and most homebrewers choose copper wort chillers for their superior heat transfer and speed. Generally, copper wort chillers will be faster than steel and prone to denting but should last many years with proper care.
In this article, I provide some aspects to consider when selecting a wort chiller. Let’s take a look at the two most popular options, a copper or a stainless steel wort chiller. Which one could best suit your needs?
Topics We Cover
Which is better: copper or stainless steel wort chillers?
Did you know?
The average person, over the age of 15, consumes about 6.4 liters of beer annually. Beer has been a favorite alcoholic refreshment for centuries. After all, beer is the result of skillfully treated grains or, as some say: liquid bread.
Alchemy may be a bust, but brewing is magic. Those who brew at home know that certain aspects of the process can be fickle.
In a fistfight between copper and stainless steel chillers, copper would win in the first round in speed because it is a better conductor of heat.
When considering heat exchange, copper is a better conductor of heat than stainless steel. A copper immersion chiller will cool your wort faster, produce a better cold break, and halt the isomerization of the alpha acids. It could seem that the decision is clear.
However, stainless steel chillers are cheaper and effective, although slower.
What makes a good wort chiller?
Brewmasters know that a perfect, clear glass of amber beer can only result from a precise chilling process. The process requires the use of a wort chiller.
In simple terms, a good wort chiller is brewing equipment designed to quickly lower your brew’s temperature. Once the boil is complete, the faster wort is chilled down to pitch-safe temperature the better so that the yeast can get started and fermentation can commence.
The process helps with the taste profile and the look of your beer.
Price and availability
A good wort chiller – whether copper or stainless steel – can cost anywhere between $50-$100. You can buy wort chillers online or in-person from most mid to large suppliers of brewing equipment.
Amazon also offers a host of good wort chillers.
Performance (heat transfer)
If you are only brewing a gallon or two, you probably do not need to invest in an expensive wort chiller. Once you upgrade to five gallons or more, then it’s time to look for a chiller. The primary benefit of using a wort chiller is that it significantly reduces the time it takes for your wort to cool down.
Without it, five gallons of wort will take several hours to cool. With the help of a wort chiller, that process is done in 15 minutes.
Other benefits include:
Wort chillers greatly reduce the risk of infection and produce clearer beer with less haze.
Durability
A good wort chiller can last for several years and withstand many brews.
Now that we discussed the purpose of a wort chiller, let’s take a look at the types. We’re looking for an immersion chiller, but the materials differ. Here are some pros and cons to consider:
Copper immersion wort chillers
Copper immersion chillers are made with – you guessed it – copper. Copper is very effective in transferring heat. Most manufacturers of copper immersion chillers use 3/8″ and 1/2″ OD soft copper tubing. Choosing the right size depends on the usual volume of your batches.
Pros
- Easy to use.
- Copper is easy to maintain and to clean.
- Copper is also resistant to corrosion in the wort.
- Highly efficient. It has the highest heat exchange rate of chillers.
- Copper is easy to weld. You can mend or solder the chiller, should it break.
- Copper and other trace minerals found in copper chillers are good for the yeast.
Cons
- One slight disadvantage of using a copper wort chiller is that it can develop a green-blue toxic oxide, called verdigris, when stored in a wet environment. Verdigris is a water-soluble compound, which can contaminate the brew. It can change the taste of your beer and can be toxic in large quantities. You should store the chiller in a dry environment and-or regularly clean the chiller with an acidic solution. If you do both, your chiller should remain in top shape.
- Copper chillers are less rigid than stainless steel chillers.
Recommendation
The HomeBrew Copper Chiller
When it comes to copper wort chillers, I recommend the Home Brew Stuff WC-25 HomeBrewStuff Super Efficient 3/8″ x 25′ Copper Wort Chiller. It is a deluxe model with a 3/4 inch hose that can withstand high temperatures. It’s a highly durable wort chiller that is efficient and easy to clean. Just connect the heavy-duty brass fittings on the chiller to a cold water source to start the process.
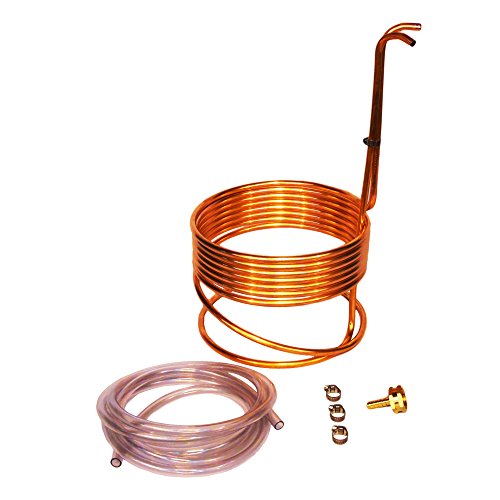
- Made in USA
- 3/8 copper, 25 length
- 6 inlet and outlet hoses
- Improves the clarity of your beer and helps separate cold break
- Reduces volatile compounds that cause DMS and other off flavors
Prices pulled from the Amazon Product Advertising API on:
Product prices and availability are accurate as of the date/time indicated and are subject to change. Any price and availability information displayed on [relevant Amazon Site(s), as applicable] at the time of purchase will apply to the purchase of this product.
Stainless steel immersion wort chillers
Stainless steel chiller is the new kid on the block. Over the past few years, stainless steel chillers rose in popularity thanks to their lower cost. The cost of copper periodically increases.
Many homebrewers see stainless steel chillers as a budget-friendly option to copper chillers.
Pros
- Easy to keep clean.
- Stainless steel can withstand corrosion for years.
- Stainless steel chillers can last longer than copper chillers.
- Stainless steel chillers are slowly becoming the standard for brewing.
Cons
- Stainless steel is hard to manipulate.
- Stainless steel leaves behind no beneficial trace minerals for yeast.
- Stainless steel is not as efficient as copper. Steel chillers can cause weaker cold breaks and longer isomerization of hop alpha acids.
Recommendation
Northern Brewer Yeast Chiller
The Northern Brewer Yeast Chiller can cool fize gallons of boiling wort down to the optimal temperature within five minutes. It is made using 18 feet of 304-grade stainless steel that makes it not only the best stainless steel chiller but also one of the most durable chillers around. Just connect the chiller to a water source, using a female-to-female adapter and begin.
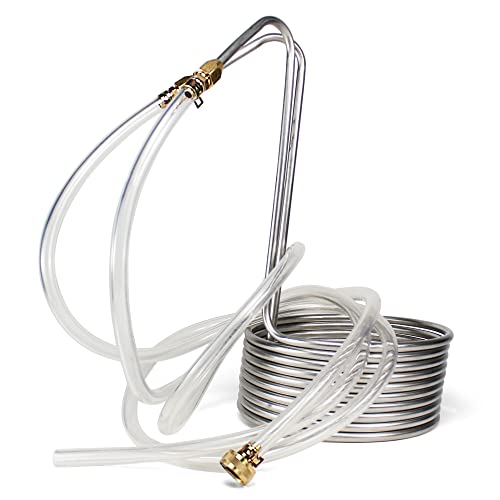
- Simply drop your clean chiller into the kettle a few minutes before the end of the boil and it will be ready to go.
- Standard garden hose connection allows for brewing outside or connects to a laundry sink faucet as your chilling water source.
- Comes fully assembled with tubing, barbed fittings, and hose clam
Prices pulled from the Amazon Product Advertising API on:
Product prices and availability are accurate as of the date/time indicated and are subject to change. Any price and availability information displayed on [relevant Amazon Site(s), as applicable] at the time of purchase will apply to the purchase of this product.
For the web story version of this article click here!