
After waiting at least two weeks for fermentation to complete, you can choose to verify with or without a hydrometer.
Fermentation of homebrew beer is done when the airlock has stopped bubbling and hydrometer readings are equal for at least three consecutive days. The hydrometer readings should be compared to the original gravity and recipe estimate to ensure that final gravity has been reached and fermentation is complete.
If you cannot obtain a hydrometer, you can estimate visually. Fermentation is finished when the majority of pitched yeast flocculates and ceases emitting carbon dioxide. Draw a taste sample to determine potential off-flavors caused by incomplete fermentation.
Topics We Cover
How to check to see if homebrew beer fermentation is complete
In all cases, a hydrometer is the preferred tool to verify that your homebrew beer has finished fermenting. They will usually be included in beer making kits.
A hydrometer is a tool used to measure the density, velocity, and gravity of the liquid. It is an enclosed glass tube, much like an oversized thermometer, with numeric readings, mercury, and lead inside.
Fun fact, some thermometers, especially older models, also contained mercury. This type of thermometer was invented by Mr. (Daniel Gabriel) Fahrenheit himself in 1714. A hydrometer is not a thermometer, they just share a common metal. The hydrometer was “formally” invented by William Nicholson in 1790. However, similar instruments date back to ancient Greece. The modern hydrometer was developed based on the Archimedes’ Principle, a physical law of buoyancy.
A hydrometer is easy to obtain, simply order one on Amazon, like this one by Home Brew Stuff or this one by Brewer’s Elite. Or just stop by your local brewing supplies store.
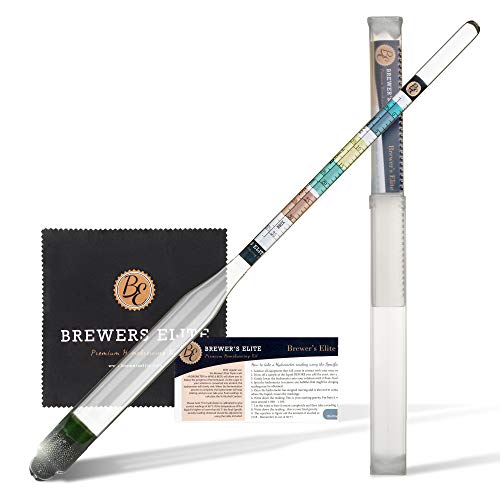
- ★ Easily calculate Alcohol % (ABV) - Graduated color bands help you know when you brew is ready, and our Crystal clear fonts are so easy to read.
- ★ Triplescale - Specific Gravity (0.99 - 1.16), Potential Alcohol (0%-20%), Brix/Balling (0-35) - Check alcohol density with ease!
Prices pulled from the Amazon Product Advertising API on:
Product prices and availability are accurate as of the date/time indicated and are subject to change. Any price and availability information displayed on [relevant Amazon Site(s), as applicable] at the time of purchase will apply to the purchase of this product.
How to use a hydrometer to check for complete fermentation
To use a hydrometer, just follow these quick steps!
Extract a sample
Before pitching the yeast, retrieve a sample of your (cooled!) wort.
Although you can take a reading directly from your brew, I highly recommend taking a sample. This way, you limit the probability of contamination, which could harm your brew. Use a beer thief, like this one from FastRack or this one from Home Brew Ohio (Or just swing by your local homebrew store.)

- Designed to easily take samples from carboys
- Hydrometer floats inside for taking gravity readings
- Touch the tip to drain
- 19 inch len
Prices pulled from the Amazon Product Advertising API on:
Product prices and availability are accurate as of the date/time indicated and are subject to change. Any price and availability information displayed on [relevant Amazon Site(s), as applicable] at the time of purchase will apply to the purchase of this product.
Check the Calibration
A hydrometer should be calibrated to measure at a specific beer fermentation temperature, usually between 60 and 68 degrees Fahrenheit. (The temperature is noted on the package or on the hydrometer itself.)
To check the calibration, simply check the gravity of distilled water at this stated temperature. If the gravity reads 1.000, your hydrometer is good to go. If the reading is off, add or subtract the difference in future readings.
Record the Original Gravity
Sanitize your hydrometer! Insert the hydrometer and record the reading.
This reading is the OG, or original gang… I mean, gravity!
Use the thief to transfer a sample from the primary fermenter into a testing container. It should have enough room to accommodate your hydrometer. After that, gently place the hydrometer into the container, allowing the hydrometer to float. For the best reading, it should float vertically, near the center of the container, without touching the sides.
At the sides, sometimes the liquid pulls slightly upwards. Physics!
The increments – indicated by dashes – on your hydrometer are specific gravity points. The line to which the liquid rises is the gravity to record. Your recipe should indicate a reference OG range.
Determine the Temperature
The standard recommended temperature is 15 degrees celsius or around 60 degrees Fahrenheit. Check the temperature of your wort, as it influences the gravity reading. If the temperature differs, I recommend using a hydrometer temperature chart or calculator, like this one by Brewer’s Friend.
Record the Final Gravity
At the end of the recommended fermentation time, obtain another gravity reading. After fermentation, your wort is now young (green) beer. The final reading should be within the range listed in your recipe. Typically, the final reading for most beer types should rest between 1.015 and 1.005 or 1/3 to 1/4 of the original gravity. You may choose to take a third test two or three days later. If the final two readings are equal, then fermentation is complete.
Three tests should suffice! Although drawing a sample significantly decreases the chance of contaminating your brew, there is still a small risk. You only need a fourth if you suspect that the fermentation is stuck.
Bonus: Determining Alcohol Content
You can also use a hydrometer to determine the alcohol content in your brew. To calculate the alcohol, you need the original and the final gravity of your beer. Then, apply the following formula:
(FG − OG) × 131.25 = ABV
Not a math type? No problem. There are plenty of calculators online, like this one, by Brewer’s Friend.
How do you know when your fermentation is complete without a hydrometer?
Fermentation is the key to converting your wort into beer. During fermentation, yeast consumes sugars in the wort, producing carbon dioxide and ethyl alcohol. Primary fermentation time depends on the type of beer. For ales, it can take 7-14 days, while lagers need 21-40 days on average. (For more information, see my blog on fermentation times). Your recipe should indicate an approximate timeframe for your project.
In general terms, fermentation is done when the yeast shows that it’s done, typically about two weeks. At that point, the yeast should flocculate and the airlock should cease bubbling.
If you are unable to purchase a hydrometer, it is still possible to estimate whether your brew is done fermenting.
Look at the Yeast Inside
I highly recommend using a clear (plastic or glass) vessel, so that you are able to observe what is happening to your brew. As the yeast completes fermentation, it should start to flocculate. A thick residue, called slurry, collects at the bottom of the fermenting vessel. Your beer will still be somewhat hazy, but noticeably clearer than when you pitched the yeast.
Check the Airlock
While your brew is actively fermenting, you will notice many bubbles forming in the airlock. This indicates that the yeast is still actively converting the sugars and emitting carbon dioxide. When fermentation is complete, you will notice significantly fewer bubbles, maybe just one every few seconds, if any. Ideally, the water in your airlock should be still.
Taste Your Beer
If you observe the previous indicators, you may want to taste test your beer. I recommend using a wine thief or turkey baster to draw a small sample from your batch. Pour it into a clear glass, then smell and taste it. If you have tasted beer before, you should be able to tell if the flavor is off. (If not, crack a cold one before this step.) Take note of any off-flavors, such as strong malty, vinegary, or stale flavors.
Note, this sample will taste flat, as it lacks carbon dioxide. This step comes later in the process. If your sample tastes a little sweet or malty, don’t worry much. These flavors balance out in secondary fermentation.
Rack Your Beer
Racking your brew helps to clarify it, leaving behind dead yeast cells and other debris. Racking means siphoning beer from the primary fermenter into a secondary vessel. Leaving your beer on the yeast cake can cause yeast bite or other unwanted off-flavors. (See more in the section on yeast autolysis in my other blog.)
Measuring the outcome when your fermenting finished
The specific gravity of your beer is a clear indication of the fermentation stage. With a hydrometer, you can measure the specific original and final gravity of your brew. If you do not have a hydrometer, you can rely on your senses.