The crisp taste and light creamy head are two of the best qualities of a good beer. These qualities that are so revered are why brewers bottle-condition beer. Adding back a small amount of fermentable sugar to the beer just before bottling creates carbonation.
Homebrewers bottle condition beer by adding priming sugar to the fermented beer just before bottling. Once bottled, yeast still alive inside the beer will ferment the priming sugar, producing the carbon dioxide necessary to carbonate the beer.
Carbonation from bottle-conditioning adds depth, and complexity of flavor that develops over time. Read on to learn the steps to successfully bottle-condition beer.
Topics We Cover
When should you bottle-condition beer?
Completing the primary fermentation is the most important factor. Premature racking is one of the biggest issues.
Most brewers choose to bottle-condition beer after primary fermentation has finished. It is easier to control the process, especially for beginners. Ales usually finish primary fermentation in 2 to 3 weeks.
Bottle-conditioning, before fermentation is complete, may produce too much carbon dioxide. When under excessive pressure, these bottles can end up cracking.
If you want to know more about what bottle conditioning is and why it is important I have a great resource for you!
Should you use a diacetyl rest?
A Diacetyl rest takes place near the end of primary fermentation. Fermentation causes the production of a ketone called diacetyl. Diacetyl produces an undesirable buttery taste in beer.
Because ales ferment at higher temperatures they don’t require an elevated temperature to clear diacetyl. The yeast is active enough to reabsorb the diacetyl before bottling. Lagers, meanwhile, often benefit from a diacetyl rest.
It can still be good to give the ale a two-day “rest period” after reaching terminal gravity. This ensures the yeast has enough time to reabsorb the diacetyl.
What temperature should you bottle-condition beer?
Temperature is important to bottle-condition beer. Cooler temperatures cause yeast to fall out and go dormant in ales before it carbonates the beer.
For best results, it’s important to keep bottles near the primary fermentation temperature (68 – 73F) while bottle-conditioning. Some brewers prefer to bottle-condition in slightly warmer temperatures from 75 – 80F.
Fermentation temperatures that are too hot create esters that produce unintended fruity flavors.
Where should you bottle-condition beer?
Bottle-conditioning should not take place directly from the primary fermenter.
For best results, rack the beer to a separate, clean container with a spigot. Transferring the beer out of the primary fermenter keeps the trub out of the beer during bottling.
Debris from the trub can lead to off-flavors and cloudy beer. It can also contribute to the production of bacteria that could cause bottles to crack from extra pressure.
Step-by-step instructions for how to bottle-condition beer
Bottle-conditioning is the process that adds carbonation to the beer. Carbon dioxide produced in the sealed bottle can’t escape, so it is gradually absorbed into the beer.
The steps to bottle-condition beer are:
- Gather the equipment.
- Verify the primary fermentation is complete.
- Wash and sterilize the equipment.
- Calculate the priming sugar
- Mix the priming sugar
- Rack the beer to a bottling bucket
- Fill the bottles
- Cap the bottles
- Store the beer
- Timeframe for bottle-conditioning
Below are the detailed steps for how to bottle-condition beer, and things to consider as you plan out the process.
Step 1 – Gather the equipment
Here is a list of equipment you’ll need to start bottle-conditioning along with a few recommendations for the best results.
- Beer bottles
- Bottling bucket with spigot
- Auto-siphon and plastic hose
- Bottle filler
- Stirring spoon
- Drying rack
- Bottle caps
- Bottle capper
Beer Bottles
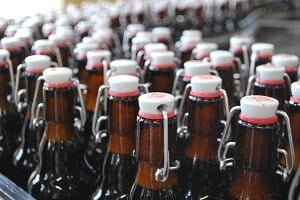
There are several choices for bottling beer including the standard 12oz longneck bottles, 22oz bombers, and Belgian-style bottles available in 375ml and 750ml sizes.
Beer bottles need to be able to withstand the intense pressure of carbonation. They should also be made of brown glass to keep the beer from absorbing light.
Bottling Bucket
The bottling bucket isn’t a necessity, but it is an easy, inexpensive way to bottle your brew.
A bottling bucket with a spigot near the bottom makes it easier to fill bottles without disturbing the trub. It also helps evenly disburse the priming sugar through the beer before bottling.
Using a vessel without a spigot for bottling means you’ll need to use a racking cane attached to a plastic hose to fill the bottles, which can be messy and time-consuming.
Additional Equipment
Other equipment you’ll need on hand for the bottling process:
- Bottle Filler – to transfer the beer from the bottling bucket into the bottles.
- Stirring spoon – to mix your priming sugar into the beer.
- Racking cane and hose to rack the beer from the fermenter to the bottling bucket.
- Bottle caps – to ensure an airtight seal on your bottles.
- Bottle Capper – to cap your bottles once they’re filled.
Keep reading for the detailed steps to bottle-condition your beer.
Step 2 – Verify primary fermentation is complete
The best way to verify that the primary fermentation is complete is to use a hydrometer.
Fermentation is usually complete when the krausen and yeast drop out, and the beer is mostly cleared. Monitor the specific gravity over 2 – 3 days. If there’s no change in the reading, the beer is ready to bottle. The specific gravity reading should be close to the final gravity (FG) listed in your ingredient kit.
If you don’t test specific gravity, you should wait 2 – 3 weeks to bottle-condition. Some brewers wait up to 4 weeks before bottling to make sure the fermentation process has finished.
Step 3 – Clean and sanitize the equipment
If you’re reusing bottles it’s important to inspect them for mold or any debris in the bottom before washing.
Bottles should be soaked in a solution of bleach and water, then scrubbed inside with a bottle brush. After scrubbing, soak the bottles in sanitizing solution, or run them through the dishwasher. Also sanitize the bottling bucket, auto-siphon, tubing, stirring spoon, and bottle caps.
An additional suggestion is to clean your bottles immediately after you drink the beer if you plan to reuse them for future batches.
Step 4 – Calculate the amount of priming sugar needed
Add priming sugar to the beer to feed the yeast. It’s important to calculate the amount of sugar needed to prevent over carbonation. Corn sugar is commonly used for this step, but there are many other types available.
A good rule of thumb for corn sugar is ¾ cup (177g) for a 5-gallon batch to reach the 2.25 volume of carbon dioxide that’s typically the desired carbonation for ales.
Use a priming sugar calculator to determine the exact measurements needed. Sugars vary in weight and sweetness so the measurements for each type will be different. Some sugars will add extra flavor to your finished beer, so keep that in mind when choosing your sugar.
Step 5 – Mix the priming sugar
It’s important to measure the priming sugar and mix it with water. The solution must be sterilized for the best results.
Weigh the sugar according to the calculator and mix it with twice the amount of water. Bring the solution to a boil to dissolve the sugar and sterilize it. Cool the sugar solution and add it to the priming bucket before adding the beer.
More even distribution of the sugar results from adding it to the bottling bucket first.
Step 6 – Rack the beer to the bottling bucket
Once the priming sugar solution is in the bottling bucket, carefully rack the beer from the fermenting container into the bottling bucket. Use a sterilized auto-siphon to rack your beer.
Use the auto-siphon to rack the beer into the bottling bucket. Gently mix the beer and sugar solution with a sterile spoon to avoid oxidizing the beer.
Only a gentle stir should be needed. Gravity will help mix the sugar solution with the beer as it’s transferred to the bottles.
Step 7 – Filling the bottles using a bottle filler attachment
Using a spring tip bottle filler will stop the flow of beer when it’s lifted from the bottom of the bottle. It automatically leaves a 1” headspace required for carbonation.
Attach the bottle filler to the spigot on the bottling bucket. Insert the filler tip into the bottle and press it down on the bottom of the bottle. When the beer reaches the top of the bottle, pull the filler attachment out of the bottle.
A bottling wand is similar to the filler attachment, but it is attached to a siphon hose with the other end attached to the spigot. The wand also has a spring-loaded tip to stop the flow of beer when lifted. Either option can be used to fill bottles.
Step 8 – Capping the bottles
Once the bottles are filled, it’s time to cap them up. If you can, invest in a good quality bottle capper to make sealing bottles easier.
Place the bottle cap in the center of the capper, or on the top of the bottle. Place the capper on top of the bottle. Push down on both handles. Inspect the cap to ensure it is correctly sealed.
If you’re using a bench capper, simply put the cap on the bottle, put it under the capper, and pull down the arm.
Step 10 – Storing the beer (temp & location)
Temperatures when choosing a location for storage during bottle-conditioning are important. Care should be taken when choosing a storage location.
Store the beer in an area that is warm enough to keep the yeast active (68 – 73F). Keep the temperature consistent during the entire bottle-conditioning process. If the temperature is too cool, the yeast will fall out of suspension and stop fermentation. This will cause the beer to have a sweet, unpleasant taste.
A dark closet in the center of your house would be an ideal location for storage.
Step 11 – Timeframe to bottle-condition beer
Bottle-conditioning is complete when all priming sugar is consumed and the desired level of carbonation is achieved.
Bottle-conditioning is usually complete in 2 to 4 weeks when using corn sugar. Other sugars may extend that time. The exact time will depend on the type of priming sugar used.
A quick test is to open and taste a bottle each week after fermenting for two weeks to track the carbonation. It’s ready to drink when the flavor and carbonation are just right.
How to bottle-condition lagers
Much of the bottle-conditioning process between lagers and ales is the same.
Temperatures during primary fermentation, the diacetyl rest period and the lagering process are different.
What temperature should you bottle-condition lagers?
Lagers brewed with lagering yeast are typically fermented at 53 – 59F. Warm the bottles to room temperature (68 – 73F) for the last 2 to 3 days of bottle-conditioning. This allows the yeast to reabsorb the diacetyl produced during fermentation.
How to give lagers a diacetyl rest
Unlike ales, lagers require a diacetyl rest before bottle-conditioning. Lower temperatures during primary fermentation of lagers mean the yeast isn’t active enough to reabsorb the ketone that’s produced during fermentation called diacetyl.
Near the end of fermentation, use a hydrometer to test specific gravity. Begin the diacetyl rest when the specific gravity reaches 2 to 5 points away from the final gravity. It should last 2 to 3 days.
The lagering process
Lagering (or aging) is the process of maintaining colder temperatures during fermentation. This process develops flavors and clears the bear before lagering.
Most brewers hold lagers around 32 – 34F. Lagering time varies by the type of beer. American lagers are held can be held for 10 to 20 days, while higher gravity German beers can be lagered for up to 6 months.
Once the diacetyl rest is complete, it’s time to rack the beer to a second vessel for bottle-conditioning.
Bottle-conditioning the lager
Once the lagering process is complete, the beer should be clear and ready to bottle.
Transfer the lager to the bottling bucket and follow the steps for bottling an ale. Store the bottles at room temperature for at least three weeks.
After three weeks, open and sample a bottle each week until the taste and carbonation are suitable.


